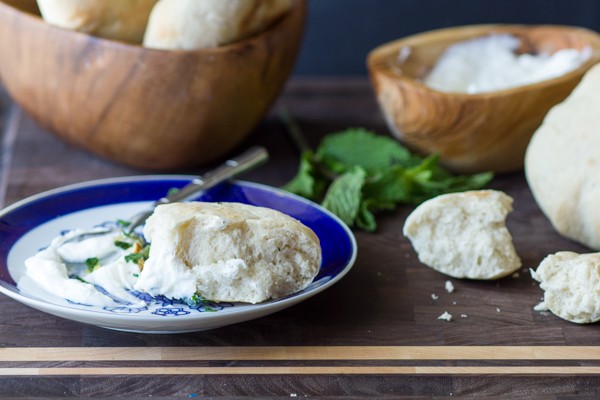
Did you know homemade pita is easier to make than you think? It’s true! You may never purchase store-bought again. (Three snaps in a z formation.)
 If you’re an American reader, are y’all prepping for the 4th? (Or Canada Day, for our friendly neighbors to the north? Or just another lovely weekend for everyone else?) I plan on on noshing on these Sumac Burgers on beet buns in a patriotic bikini while lying in a cabana. Yes, ma’am.
This past weekend was jam-packed with goodness, per usual. Friday we stalked saw my two favorite Andys (besides my brother Andypooh of course!) Anderson Cooper and Andy Cohen! If their tour comes to your town, I highly recommend it. A wonderful mix of two friends sharing stories, humor, current events, and a little background on AC squared. It’s always a great reminder to see how success isn’t overnight, both AC worked super hard to get where they are. Then, Sunday night I headed west of Austin to Wimberley to do a rugelach demo for a bunch of camp counselors! It reminded me of my days at Jew camp. Loved it!!
And now, pita.

Growing up, we always had pita around, not homemade, but definitely tasty. My mom would toast it until almost burnt, schmeared with butter. Yum. But it can’t compared to homemade- it’s super easy, you just need some rising time. And warm pita out of the oven? It just can’t be beat with a stick, y’all. Use it to make my Fried Green Tomato Sabich, or with homemade hummus. Yasss.


Homemade Pita
Ingredients
- 1 package active dry yeast 1/4 ounces or 2¼ teaspoons
- 1 tablespoon granulated sugar
- 1¼ cups warm water 110 degrees F
- 1 tablespoons extra virgin olive oil plus more for drizzling
- 2 1/2 - 3 1/2 cups bread flour
- 1 teaspoon salt
Instructions
- To make the pita, place the yeast, sugar and warm water in the bowl of a stand mixer with hook attachment. Let sit for 10 minutes until foamy (if it doesn't form, your yeast is dead or the water was the wrong temperature.) You can also make this by hand using a large bowl.
- Add the oil and gradually add 2½ cups flour with the mixer on low speed. Then add the salt and turn the speed up to medium-high and mix for 6-8 minutes. Keep adding flour until dough is smooth and elastic and slightly sticky. Do not add too much flour. You can also knead by hand.
- Clean out the bowl and place dough in the clean bowl coated with oil, cover with a towel or plastic wrap, and let rise in a warm spot for 2 hours, or until doubled in size.
- When the dough is ready, divide the dough into 6 equal sized balls (or however many you like) and fatten into 1/2 inch thick discs. Place pitas on parchment paper, cover lightly, and let rise 30 more minutes.
- Preheat oven to 500 degrees F. Place a baking sheet in the oven to pre-heat as well.
- At this point you can bake the pita for puffier pitas, or roll out for pitas with a pocket.
- Roll each pita out to 1/4 inch thick. Don't roll more than you need as this will affect the pocket making process! Cover and let rest for 10 more minutes.
- Carefully flip the pitas over, spritz with a little water to help with steaming (optional) and carefully place on the hot baking sheet at least 1-inch apart. You will need to bake in batches. Bake for 5-6 minutes, until puffy and slightly brown. Do not overcook. Eat! Keeps in an airtight container for up to three days; reheat before serving.

I hate to be a nudge but if you use instant yeast, do you need to use the warm water with it? I only have instant
I haven’t tried with instant yeast, but yes that should work!
You can use the “instant” yeast just dissolve it in the warm water like you would with “active dry” yeast. or you can experiment and see what happens. That’s the fun in baking and cooking. I use “instant” yeast when I make my Challah it works great.
Thanks for the tip!!
Thank you for your help, Amy and Ron!
You’re welcome
I use almost the same recipe (I use AP flour instead of bread flour) to make a naan-like bread which I roll out and cook on my grill. The grill marks and a bit of crispy char make it the perfect jacket to hold a skewer of marinated grilled chicken or beef. Add some nicely carmelized onions and peppers for an awesome gyro type sandwich! Remember to remove the skewer before that first bite!
Amy: Thanks for your time and recipes!
Ooh I love the idea of putting it on the grill!! Thanks for the tip!